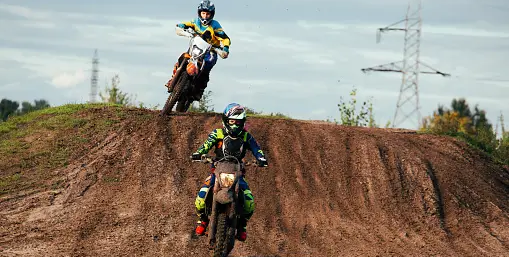
Regarding motocross, your bike is more than just a machine; it’s an extension of yourself and a reflection of your personality. This is where custom motocross graphics come into play.
Don’t simply regard them as stickers; they are your style statement, so they should be stylish and timeless, showcasing your identity and sponsors.
In this short article, we will explore custom motocross graphics and how to choose the right design for your motocross bike. Let’s get started!
Motocross Graphics – A Quick Overview
Motocross graphics are customized decals or stickers applied to the plastic bodywork of motocross or dirt bikes. They serve aesthetic and practical purposes, allowing bikers to customize their bikes with distinctive colors, designs, and sponsor logos.
Moreover, these plastic stickers are made of reliable and durable materials that protect the bike surfaces from scratches while enhancing their visibility on the track.
How to Customize Motocross Graphics – Step-by-step Guide
Let us walk through the step-by-step guide on customizing the motocross graphics to make your bike stand out.
-
Choosing the Right Graphic Designer
The first and foremost step for designing the motocross graphics is picking the right graphic designer. Seek recommendations from your fellow riders or online motocross communities.
While picking the graphic designer, thoroughly review their portfolio and pay special attention to their experience with the motocross graphics. Look for a track record of creating motocross designs that resonate with your likes and dislikes.
And most importantly, pick a designer who can feel your vibes and connect with your thoughts and ideas.
-
Choosing the Right Material
While customizing the motocross graphics, picking the suitable material is paramount. Two main picks for the material are as follows:
Vinyl Graphics
One of the most popular choices in motocross graphics is Vinyl. It is preferable due to its high resistance and durability. In addition, it offers fantastic protection against scratches, debris, and scuffs, maintaining the bike’s sleek appearance.
Laminated Plastics
Another robust alternative is laminated plastic. It combines the durability of plastic with a laminated layer. While it doesn’t offer as much flexibility as Vinyl, it can withstand many elements.
-
Size and Placement
Selecting the right size and placement for your motocross graphics is vital. Consider your bike’s model and size, ensuring the graphics complement its proportions. In addition, factors in your racing number and personal preferences also matter.
-
Cost Considerations
Custom motocross comes with varying prices influenced by design quantity and intricacy. While quality should never be compromised, consider your budget. Prioritize essential design elements and explore cost-effective options for materials and production.
-
Installation
Once you have carefully considered all aspects, it’s time for the installation. Follow these steps for successful installation:
- Clean the surface and make it dust-free. Use mild detergent to remove debris.
- Lay out graphics and ensure they align with the intended placement.
- Carefully peel a section and start installing it in the desired place.
- Finally, trim the excess sticker and heat the sticker to seal.

In a Nutshell
Undoubtedly, custom motocross graphics are the ultimate fusion of style and identity. With the right color combination and design, your bike can become the reflection of your passion and racing spirit.