Embarking on the journey of creating your own home photography studio is a thrilling venture filled with exciting possibilities. The convenience and control that comes with having your personal space tailored to capture your unique style of photography are beneficial for both amateurs and professionals.
Quick peek into the benefits of a home-based studio
Having your own photography studio at home allows you:
– Flexibility: Shoot any time you want without the need to rent a space.
– Control: Customize the studio to your liking, making a comfortable environment that enhances your creativity.
– Cost-Efficient: Save money over time by eliminating rental fees and transportation costs.
Brief about the guide
This guide is designed with the DIY enthusiast in mind, presenting affordable and practical steps to set up your own home photography studio. Whether you’re looking for basic tips on choosing studio equipment or advice on how to utilize your space efficiently, this guide has you covered. Let’s dive in and get started on this exciting DIY journey!
Why opt for a DIY Home Photography Studio?
In this digital age, having a personal space to explore and create beautiful imagery is more than a luxury—it’s a necessity. Opting for a DIY home photography studio not only allows for convenience but also helps in honing your photography skills. There are a couple of factors that you might want to consider before you delve into creating your very own studio space.
Understanding the Necessities
The main thing about a home photography studio is that it does not necessitate massive, expensive equipment. A few essentials like a reliable camera, good lighting sources, and backdrops are what primarily make up a home studio. Don’t forget a sturdy tripod and some props to bring life to your frames!
Analysing the Cost and Space Effectiveness
One of the many perks of a DIY home photography studio is its cost and space effectiveness. Depending on the scope of your creativity, a humble corner of your living room or your garage can serve as a perfect mini studio space. You get to design and control your setting and circumstances based on your budget and creative requirements. Now isn’t that something to look forward to?
Things to Consider Before Starting
Before embarking on your DIY journey to build a home photography studio, there are a couple of things you need to ponder.
Evaluating Space Availability
Firstly, take a good look around your house and identify possible locations for the studio. Check out the areas with good lighting and enough space for your equipment. You don’t need a huge area; an unused bedroom, basement, or garage can do the trick.Work with what you have, creativity is key!
Budget Planning
The second factor to take into account is your budget. What can you afford to spend on this project? This will help guide your purchases. Remember, you don’t need the most expensive gear to capture great photos or create professional stock photos. Budget-friendly options, like using natural light or DIY light modifiers, can be just as effective. Moreover, you can always start small and progressively upgrade your equipment as your skills grow.
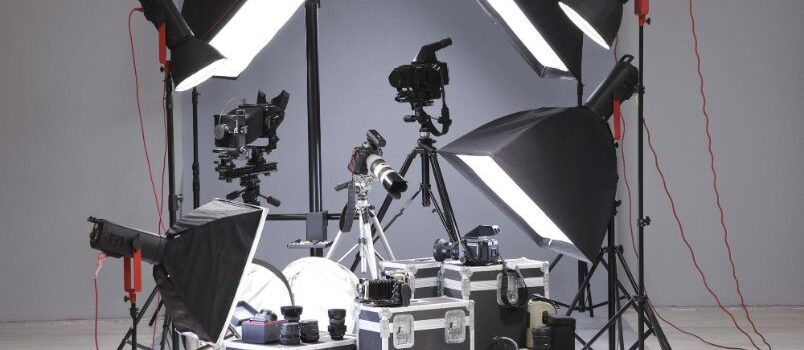
Choosing the Right Equipment
Creating the perfect home photography studio begins with selecting the right equipment. Don’t sweat if you’re on a budget; remember, the most important tool to capture stunning visuals is your creativity!
Cameras and Types
First and foremost, a quality camera is the beating heart of your studio. The type of camera you opt for depends largely on your specific photography needs and budget:
– Digital Single-Lens Reflex (DSLR) cameras are classic options offering interchangeable lenses, excellent image quality, and manual controls.
– Mirrorless Cameras, while a bit pricier, offer similar functionality to DSLRs but in a compact size and often with better video capabilities.
– Compact Digital Cameras or ‘Point and Shoot’ cameras are inexpensive and user-friendly, great for beginners yet limited in advanced controls.
Importance of Good-Quality Lenses
Investing in good-quality lenses is equally important as they can significantly impact your image quality. Prime lenses with fixed focal lengths offer sharper images, while zoom lenses provide flexibility.
Lights and Their Types
Lighting is key. Natural window light makes a great starting point for beginners. As you expand, consider investing in types of lights like continuous lights for video, and strobes or speedlights for still photography.
The Need for Tripods
Don’t underestimate the power of a good tripod. It can dramatically improve the sharpness and quality of your shots by providing stability, especially in low light conditions or for long exposure shots. Consider its maximum height, sturdiness, weight, and portability while purchasing one.
Setting Up the Studio – Basics
Every home photography studio begins with the basics. These broadly include background materials, placement of lights, and positioning of your camera. Here’s a more detailed look to help you master the initial setup.
Importance of Background Materials
The role background materials play in setting the right tone for your pictures cannot be overstated. They serve as the canvas for your compositions, and the ideal background can drastically improve the quality of your pictures. Here’s what you need to have:
– A variety of plain colored backdrops for solid background shots.
– Some texture or patterned backdrops for a bit of creative flair.
– White foam boards that can create simple, clean backgrounds or work as reflectors.
Placement of Lights
Lighting is your best friend in a home photography studio. The placement of your lights determines the overall mood and feel of your photos. For the best results, we recommend a three-point lighting setup – a key light, fill light, and backlight.
Positioning the Camera
The position of your camera matters just as much as the subject of your photos. Think about your shot composition. Use a tripod for stability, especially for long shots or macro photography. Experiment with different angles and heights to create dynamic and interesting visuals.
DIY Tips for Improvised Studio Equipment
Crafting your own photography studio doesn’t mean you have to spend big on professional gear. With a little ingenuity and resourcefulness, you can create effective studio equipment straight from your home. Let’s delve in!
Creating DIY Light Diffusers and Reflectors
Controlling light effectively is the key to extraordinary studio photography, and you can do just that without breaking the bank. For a DIY diffuser, you can use a white bed sheet or translucent fabric over your light source. This will scatter strong light, making it softer and more spread out. As for reflectors, styrofoam boards or large foil sheets on cardboard can work wonders in bouncing light on your subject.
Building your own backgrounds
You can also create your custom backgrounds easily. Using seamless paper, fabrics of different patterns and colors, or even painted plywood, can create an array of backdrops to suit any photography mood or theme you’re aiming for.
Cheap and effective DIY tripods
Lastly, don’t underestimate the potential of everyday items. A pile of books, a sturdy box, or even a ladder can act as a makeshift tripod when needed. These DIY solutions are perfect for adding that much-needed stability without the need for expensive equipment. With a little creativity, your home studio setup can be just as effective as any professional setting.
Simple and Effective Photography Tips
Making your own home photography studio isn’t just about the setup – it’s equally about honing your photography skills for us to create jaw-dropping shots. Let’s go through some fundamental photography tips that will help you make the most of your new studio.
Understanding Angles
An understanding of angles can immensely elevate your photography game. Experiment with high angles, low angles, and even diagonal ones to see how each perspective alters your photo. Keep in mind that different subjects and scenarios call for different angles – so don’t be afraid to play around!
– High angles can make your subject appear small or vulnerable
– Low angles can make your subject look powerful or daunting
– Diagonal angles can add a dynamic, dramatic feel to your shot
Working with Lights
Lighting is the heart of photography. Begin by understanding the basics, such as the difference between soft light (which is diffused and gentle) and hard light (which creates stronger shadows and contrast). Play with different lighting situations, such as front-lighting, back-lighting, and side-lighting to see the effect they have on your subject.
Post-Production Processing
Lastly, post-production processing is your secret weapon to perfecting your shots. Software like Adobe Lightroom or Photoshop can help you adjust color balances, remove unwanted objects, and add final touches that can take your photos from good to great. Prioritize learning the basics of post-production to maximize your home studio’s potential.
Tips to Maintain your Studio
Setting up a home studio is just one piece of the puzzle; maintaining it well is what will keep your creativity consistently flowing. Here are some tips to keep your studio in top shape.
Cleaning and Maintenance of Equipment
In order to produce the highest quality visuals, it’s crucial to keep your lenses clear and your equipment up to par. Remember to clean your camera sensor and lenses regularly, using a lens pen or air blower to get rid of any dust or smudges. Store your equipment carefully, using racks or cases to prevent any damage. Also, don’t forget to periodically update your software and check for any necessary hardware updates.
Space Management Tips
Efficient space management is key to a functional photography studio. Always remember to utilize vertical space. Wall-mounted shelves or pegboards are a great way to store equipment while maximizing the room. Keep commonly-used items within easy reach, and ensure that all materials are properly put away after use.
Keeping up with Latest Photography Trends
And lastly, try not to fall behind! The world of photography is ever-evolving. Make it a habit to research on the latest photography techniques, studio equipment, and editing tips. Learning and incorporating new trends in your work can take your home photography studio to the next level!
As we wrap up this blog post, let’s quickly recap some essential tips for setting up your DIY home photography studio:
– Choose a room with good natural lighting, but also invest in quality artificial lights if necessary.
– Use props, backdrops, and reflectors to enhance your shots.
– Invest in a decent camera and tripod – you don’t need the most expensive gear, just what suits your needs.
– Make use of what you have. DIY solutions can often deliver striking results.
Encouraging words of motivation for beginners
Embarking on this DIY journey to create your own home photography studio might be challenging, but remember, the best things in life often come out of hard work and dedication. With every shot you take, you are learning, growing and expressing your creativity. The beauty of a home studio is that it’s entirely yours. Every inch of it is a reflection of your personal style and vision, so take pride in creating something truly personal. Don’t be overwhelmed, and remember – the world is your canvas. So, get started and create beautiful art right there in your home!